Lumberjack Engineering
Modular Mount Panel for 4th Gen 4Runner Center Dash Panel (2003-2009)
Modular Mount Panel for 4th Gen 4Runner Center Dash Panel (2003-2009)
Couldn't load pickup availability
**Like any good project, our new site is fully built but needs a shakedown run. Head over to beta.theartisangarage.com to grab your handcrafted parts**
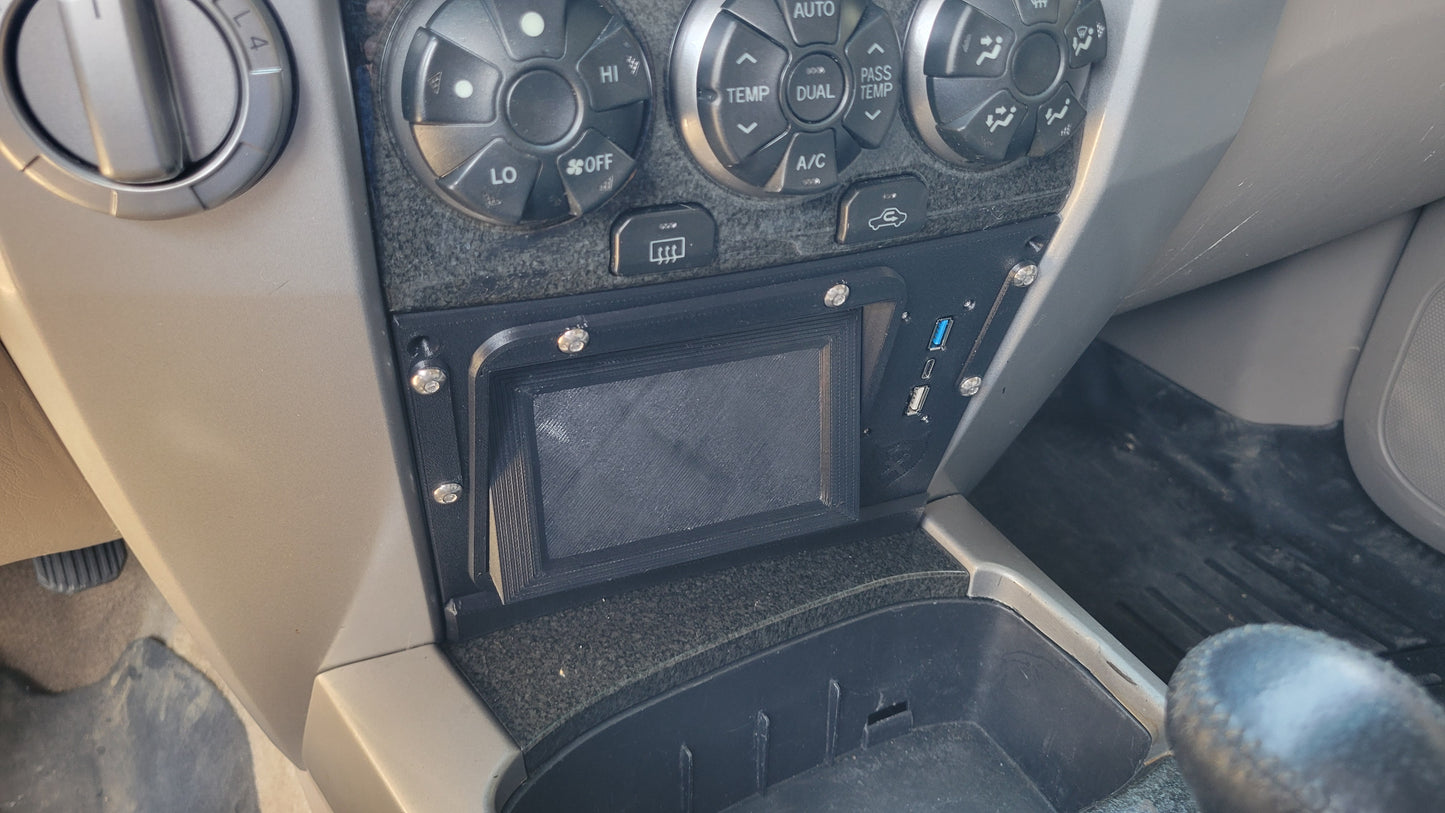
Make use of that odd center cubby space in your 4Runner!
Maybe one day we'll figure out how Toyota intended you to use that weird storage cubby in front of the cupholders in the 4th Gen 4Runners... but until that, make that space useful with one of our Modular Mount Panels!
Need to mount an Auxbeam? We've got you. Want some OEM Toyota-style push button switches instead? You betcha. Just need a MOLLE panel to stash some gear? Totally! Need something not listed? Hit us up!
And the cool part about this setup? The main panel is the EXACT same between all variants - so if you decide you want something different down the road (or want to come up with your own designs), then you can easily change out the modular insert just by removing the 4x M5 button head cap screws.
So - that's all fine & dandy for the left hand of the cubby, but what about the super shallow right hand side of the space? Well, we made that useful too! We've integrated a USB charger into this new faceplate - it has a Quickcharge 3.0 USB-A, a Power Delivery 3.0 USB-C, and a 2.4A USB-A port to keep your devices powered for the long haul.
And finally - to top it all off, we also offer RAM mount adaptors that allow you to attach RAM 'B' size diamond bases (not included) off to either side of the Modular Mount Plate - the exact same mount adaptor can be used for either driver's side or passenger side, just by rotating it 180 degrees. Or - grab one for each side!
Compatible Devices:
NOTE: We're ALWAYS interested in designing a new insert to let you mount whatever you need to! Please reach out to us with your request.
-
Main Center Insert
- Auxbeam 8 Gang/6 Gang Switch Panels
- SwitchPros SP9100 8 Gang Switch Panel
- SPOD Touch Screen Switch Panel
- Scan Gauge 3
- Blueseas M2
- 5x 'OEM Toyota Tall' switches
- NX Nitrous Express Window Switch
-
Side Mount Accessory Adaptors:
- RAM Ball Diamond Base
- Quadlock 2-hole base.
Installation:
The Modular Mount Panel (MMP) itself [with the exception of the Blue Seas M2 version] does not require ANY permanent modification - just remove the old cubby, drop the lower tabs of the MMP into the same slots that the cubby used, and push the top of the MMP towards to dash & insert the countersunk screws into the top - they should go into preexisting holes (you may need to remove a rubber bumper from the hole first).
However - Depending on how crafty you get with the wiring of the Auxbeam/Toyota-style switch variant, you *may* need to drill a hole in the backside of the cubby space to run the wires through - don't worry though, if you ever wanted to revert back to the 'OEM' cubby insert, it'd cover up this hole entirely.
Notes:
- The MOLLE grid version has cutouts that are 24mm wide by 14mm tall, with 7mm between them. Want something different? Easy day - just let me know. That actually goes for that entire insert - need to mount something there that's not currently supported? Shoot us an email!
- The 'OEM Toyota Tall' Style version has the modular insert designed as a two-piece assembly to allow you to insert the switches, then assemble it together.
- The 'OEM Toyota Tall' Style has the switches tilted as far back as it does to do the best it can to avoid the cupholders - it should clear most any cup, but check the side-view photo for a better idea.
- The '8-Gang Auxbeam WITH USB-A Passthrough' option includes a panel-mounted USB connection with a 1' lead on it that ends with a right-angle USB-A male connection. The intention here is that you can use this to plug into a Car Play or Android Auto headunit and provide a pass-through connection to that headunit from the Modular Mount Panel.
- The SPOD Touchscreen and Scangauge 3 variants includes a very low-profile/flat 1' Ethernet cable + coupler since the space behind the SPOD & Scangauge 3 is tight.
- The Scangauge 3 mounts to the Modular Mount Panel by removing the 4 screws from the back of the SG3, placing it into the MMP, and then installing the longer screws provided through the MMP and into the SG3.
- The version for only the "Blue Seas M2 DC Multimeter with SoC" requires you to cut some of the back wall of the stock cavity away to allow for the very long circular protrusion on the back of the M2. While this is a permanent modification to your truck, if you ever decide to revert back to the stock cubby compartment it'd be hidden.
All parts are printed out of carbon-fiber reinforced ASA for long term strength, heat resistance, and UV-stability! Comes with all hardware necessary for use. The integrated USB charger has a pair of wires (positive/negative) that need to get connected to a 12V & ground (respectively) of your choice - that can be with an add-a-fuse at the drivers side fusebox, or the 12V outlet in the center console, etc. You'll need some extra wire to make those connections, just as a FYI.
Compatible Vehicles:
- 4th Generation 4Runner: 2003, 2004, 2005, 2006, 2007, 2008, 2009